Locate Windows Server 2019 and download the ISO image
DO NOT INSTALL THE IOS FILE – JUST DOWNLOAD IT ON YOUR LAPTOP
3. VM Configuration
We are going to set up 3 VM Machines (ABRODCP01, ABRODBSP02, ABRODBSP03)
Launch the Oracle VirtualBox program
Select New
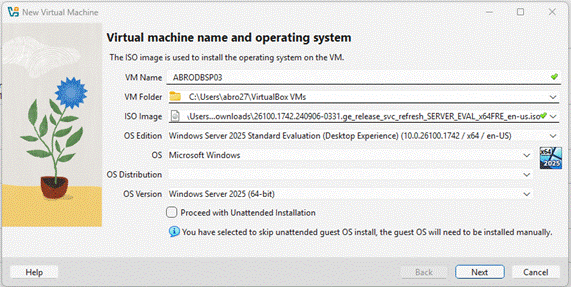
Under the name, put ABRODBSP03
Under ISO Image, select the windows you downloaded
For the Edition, select Standard edition (Desktop Experience)
Uncheck box next to Proceed with Unattended Installation then hit Next
Adjust Base Memory, CPU and Disk Size then hit Next
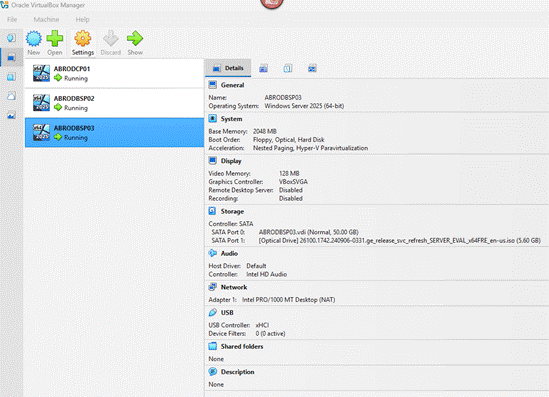
Check the Summary and hit Finish
Install the rest of the VMs the same way as well (ABRODCP01, ABRODBSP02)
4. Installing Windows OS
Once we finish creating the VMs, click on the first one and start installing the Windows OS.
Click on ABRODBSP01
Click on Start → this will start the downloading and installing of the Windows Operating Server process.
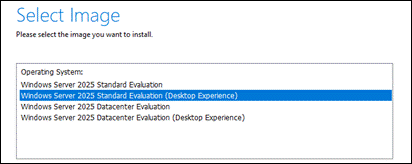
Make sure you are selecting the Windows Standard Version with Desktop experience then hit Next (See picture below)
Accept license agreement → No need to change anything after this point. Click on Install and let Windows complete the installation.
At the end of the installation, you will be prompted to provide password for the Administrator Account (Don’t forget this password. It is advisable to use the same password for all the VMs)
Do the same for the rest of VM servers and compete installing the OS on all VMs.
5. VM Network Configuration
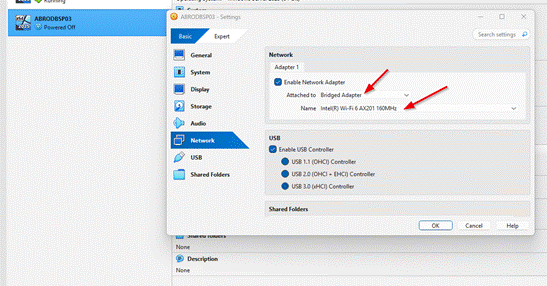
From the oracle box, select each machine (example: ABRODCP01)
Click on Setting → Network → Change the adaptor to Bridge adapter → Pick the available wifi/wireless router
Do the same thing for all of the VMs in the list (You might need to turn off the VMs to make some VM level changes from the Settings menu)
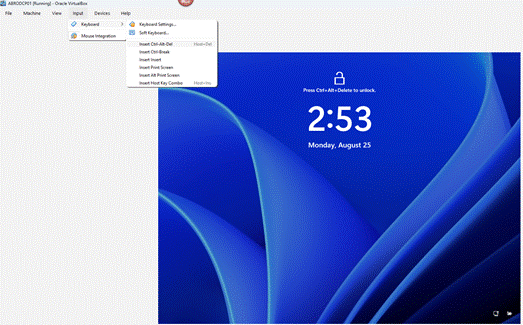
6. Login to the VMs
Click on the Machine name and click on Start
Input Ctrl+Alt+Delete from the Input Menu
Input the Administrator password you provided on the installation
After login in, make sure to change the computer’s name:
Click on the window sign→ Settings → System → About → Rename this PC → Give the name as the same as the VM (example: ABRODCP01) à Click on Ok → Hit Restart now button.
Make sure to change the names for all the VM’s.
To check if the name is changed go to cmd →hostname → make sure the name matches